The Apple Pencil is a powerful and handy tool that can completely improve the way you interact with your iPad. Whether you’re an artist, a student, or a professional, the Apple Pencil offers a natural way to draw, write, and navigate your iPad’s interface. With its precise input, pressure sensitivity, and tilt recognition, the Apple Pencil can enhance your productivity, creativity, and overall user experience.
However, do you know “how to connect Apple Pencil to iPad”? Before you can start using the Apple Pencil, you need to properly connect and pair it with your iPad. Depending on the generation of your Apple Pencil and the compatibility of your iPad model, the connection process might be different.
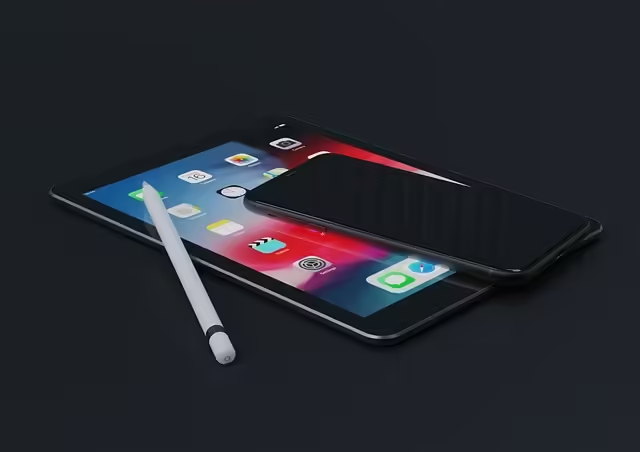
Knowing Your Apple Pencil and Compatible iPad
There are three main Apple Pencil models: the 1st generation, 2nd generation, and Apple Pencil Pro. Each has a distinct design and works with specific iPad models. Here’s a breakdown to help you identify yours:
- 1st generation Apple Pencil: This Pencil is round and smooth, with a Lightning connector at the tip. It’s compatible with older iPads that have a Lightning connector, like the 6th–9th generation iPad, the iPad mini (5th generation), and the iPad Air (3rd generation).
- 2nd generation Apple Pencil: Flat on one side and sporting a matte finish, the 2nd generation Pencil charges wirelessly by magnetically attaching to the side of compatible iPads. It works with the iPad Air (4th and 5th generation), iPad mini (6th generation), and various iPad Pro models (11-inch: 1st–4th generation) and 12.9-inch: 3rd–6th generation.
- Apple Pencil Pro: Similar in design to the 2nd generation Pencil, the Apple Pencil Pro also charges magnetically. It’s exclusively compatible with the latest iPad Pro models featuring the M2 or M4 chip (11-inch and 12.9-inch).
To identify your iPad model, navigate to Settings > General > About.
| Apple Pencil | Compatible iPads |
| Apple Pencil (1st generation) | iPad (6th–9th generation), iPad mini (5th generation), iPad Air (3rd generation) |
| Apple Pencil (2nd generation) | iPad Air (4th and 5th generation), iPad mini (6th generation), iPad Pro (11-inch 1st–4th generation), iPad Pro (12.9-inch 3rd–6th generation) |
| Apple Pencil (USB-C) | iPad (10th generation), iPad Air (4th and 5th generation, M1 and M2), iPad Pro (11-inch and 12.9-inch, M1 and M2) |
| Apple Pencil (Pro) | iPad Air (11-inch M2), iPad Air (13-inch M2), iPad Pro (11-inch M4), and iPad Pro (13-inch M4) |
How to connect Apple pencil to iPad
Connecting Apple Pencil (2nd generation) and Apple Pencil Pro

Magnetic Connection:
The 2nd generation Apple Pencil and Apple Pencil Pro boast a hassle-free magnetic connection method. Here’s how to connect them to your compatible iPad:
- Locate the Magnetic Spot: Identify the flat edge on the right side of your iPad. This is the designated spot for magnetic attachment.
- Magnetic Attraction: With the flat edge facing you, hold the top of your Apple Pencil close to the magnetic edge on your iPad.
- Snap and Pair: The Apple Pencil will be magnetically drawn to the iPad and snap securely into place. You’ll see a prompt appear on your iPad screen asking you to “Pair” the device.
- Confirm Pairing: Tap “Pair” on the prompt to finalise the connection. Bluetooth needs to be enabled on your iPad for successful pairing (Settings > Bluetooth).
As an added benefit, magnetically attaching the Apple Pencil to your iPad also initiates charging. So, you can keep your Pencil powered up while it’s conveniently docked.
Connecting Apple Pencil (1st generation)
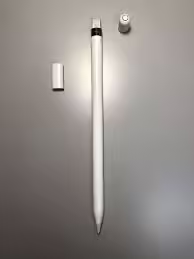
The connection method for the 1st generation Apple Pencil depends on whether your iPad has a Lightning connector or a USB-C port. Let’s explore both scenarios:
- For iPads with a Lightning Connector:
- Remove the Cap: Unscrew and remove the cap from the tip of your Apple Pencil.
- Direct Plug-in: Simply insert the Lightning connector at the tip of your Apple Pencil directly into the Lightning port on the bottom of your iPad.
- For Newer iPads with a USB-C Port:
- Adapter Required: Since these iPads lack a Lightning port, you’ll need the USB-C to Apple Pencil Adapter (sold separately).
- Connecting the Adapter: Plug the thin end of the adapter into the Lightning connector on your Apple Pencil.
- USB-C Cable Connection: Take a standard USB-C cable and connect one end to the USB-C port on the adapter.
- Connect to iPad: Plug the other end of the USB-C cable into the USB-C port on your iPad.
Regardless of the connection method, once you’ve plugged in your 1st generation Apple Pencil (lightning or USB-C adapter), a pop-up window will appear on your iPad screen displaying a “Pair” button.
5. Tap to Pair: Tap the “Pair” button on the pop-up window to establish the connection between your Apple Pencil and iPad.
Connecting Apple pencil USB-C
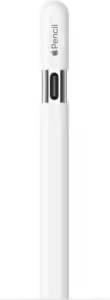
- Grab your Apple Pencil (USB-C) and a USB-C cable. The cable typically comes with your iPad, but any USB-C cable will work.
- Slide open the flat end of the Apple Pencil (USB-C). This will reveal the USB-C port.
- Plug the USB-C cable into the port on the Apple Pencil.
- Plug the other end of the USB-C cable into the USB-C port on your iPad. The USB-C port is usually located on the bottom edge of the iPad.
- Look for a pop-up notification on your iPad screen. It should say “Apple Pencil” and have a “Tap to Connect” button.
- Tap “Tap to Connect” on your iPad screen. This will pair your Apple Pencil with your iPad.
That’s it! Your Apple Pencil (USB-C) should now be connected and ready to use.
Common Reasons for Connection Issues
Several factors can prevent your Apple Pencil from connecting seamlessly. Here are some of the most common ones:
- Disabled Bluetooth: Bluetooth acts as the invisible bridge for communication between your iPad and Apple Pencil. Ensure Bluetooth is turned on for a successful connection.
- Outdated iPadOS: Outdated software can sometimes lead to compatibility issues. Regularly updating your iPad OS helps maintain optimal functionality.
- Low Battery: A depleted Apple Pencil might struggle to connect. Keep it charged for smooth operation.
- Incorrect Pairing: In rare cases, the initial pairing process might encounter errors. Re-pairing your Apple Pencil can often resolve the issue.
Troubleshooting Steps:
Let’s walk through some solutions:
- Enable Bluetooth:
- Open the Settings app on your iPad.
- Tap on Bluetooth.
- If Bluetooth is disabled, toggle the switch to the ON position.
- Check for iPadOS updates:
- Open Settings on your iPad.
- Tap on General.
- Select Software Update.
- Your iPad will check for available updates. If an update is found, tap Download and Install.
- Charge your Apple Pencil.
- The charging method depends on your Apple Pencil generation.
- 2nd generation & Apple Pencil Pro: Magnetically attach the pencil to the side of your iPad.
- 1st generation:
- For iPads with a Lightning connector, plug the pencil directly into the Lightning port.
- For iPads with a USB-C port, use the USB-C to Apple Pencil Adapter and a USB-C cable to connect the Pencil to your iPad.
- The charging method depends on your Apple Pencil generation.
- Forget and Re-pair Your Apple Pencil:
- If the above solutions don’t work, try re-pairing your Apple Pencil:
- Open Settings on your iPad.
- Tap on Bluetooth.
- Find your Apple Pencil listed under My Devices.
- Tap the information icon (i) next to your Apple Pencil.
- Select Forget This Device.
- Confirm by tapping Forget Device.
- Now, follow the connection steps mentioned in Section III (depending on your Apple Pencil generation) to re-pair your Pencil.
- If the above solutions don’t work, try re-pairing your Apple Pencil:
Additional Tips:
- Restart your iPad: Sometimes, a simple restart can resolve temporary glitches that might be hindering the connection.
- Ensure a firm connection: For the 1st generation Pencil using the Lightning connector, ensure it’s securely plugged into the iPad’s port.
- Clean the Lightning connector or USB-C port (if applicable). Dirt or debris can obstruct a proper connection. Use a soft, dry brush to gently clean the port on your iPad.
Pencil Disconnecting During Use
If your Apple Pencil keeps disconnecting while you’re using it:
- Make sure the Pencil tip is not damaged or missing. Replace it if needed
- Ensure the Pencil is fully charged. Low battery can cause disconnects
- Try turning Bluetooth off and back on on your iPad to reset the connection
- As a last resort, unpair and re-pair the Pencil to your iPad
Conclusion
The Apple Pencil is a very handy tool that enhances the way you use your iPads. It gives you the means to enhance your creativity, but without knowing how to connect this gadget to your iPad, you can’t benefit from the creative freedom that it provides. Whether you have the first-generation apple pencil or the most recent apple pencil, you can connect it to your iPad with ease as long as they are compatible. We’ve provided you with the best guide on how to connect your apple pencil and your iPad, as well as how to troubleshoot possible connection issues.
FAQs
- What if I don’t see a pop-up window to connect my Apple Pencil?
- Make sure Bluetooth is turned on in your iPad settings.
- Restart your iPad and try connecting again.
- Forget the Apple Pencil in your Bluetooth settings, and then re-pair it.
2. How do I forget a previously connected Apple Pencil?
- Go to Settings > Bluetooth.
- Find your Apple Pencil in the list of devices.
- Tap the info icon (i) next to the pencil.
- Tap “Forget This Device” and confirm.
3. How do I check the battery level of my Apple Pencil?
- Open the Control Center on your iPad.
- Look for the battery indicator next to the Apple Pencil icon (it may not be available for all models).
- Alternatively, go to Settings > Bluetooth and tap on your Apple Pencil to see the battery level.
4. Can I use a third-party USB-C cable to connect my Apple Pencil (USB-C)?
- Yes, any USB-C cable that is certified will work for charging and connecting the pencil.
5. My Apple Pencil is unresponsive and disconnects frequently. What can I do?
- Check for software updates on your iPad and ensure you have the latest version of iPadOS installed.
- Replace the tip of your Apple Pencil if it’s damaged.
- If the issue persists, contact Apple Support for further assistance.



Keep up the good work